Monday, December 27, 2010

An ETSY SALE to Ring in the New Year!


Ahhh the end of the year festivities! I wish you all happy & safe soirees and festivities, if you should partake. I would also like to thank each and every one of you who stop by my blog to read my little bits and bobs....and all of my kindred spirits who email me and keep up with the goings on here, and of coarse, all the Angels who have given my dollys a home. I wish you all a Blessed New Year...and offer you a challenge, to do something you have never done before, but always wanted to. Stop waiting, just do it already!

To celebrate the end of this 2010, I offer a 25% off discount on anything and everything in my ETSY store~ just enter coupon code YND2010 at your checkout. This offer is good from now until the first of January, 2011.

HAPPY NEW YEAR EVERYONE!!!!!

Sunday, December 19, 2010

My most Sincere Wishes for You a Blessed & Magical Holiday~

I hope you all have a wonderful Christmas, and if you don't celebrate Christmas, I hope you have a Blessed Holiday~ whatever it is! The dollys and I are settling in for our long Winter hibernation.....we love to just sit and gaze at the tree with all the pretty lights, all the while remembering Christmases past and all our favorite memories. A sip of our favorite Constant Comment tea, and a softly crackling fireplace~ what a gift in itself to enjoy this time with each other! With all the hustle and bustle now, I hope you all make time for a quite evening with family and all your favorite memories~ and perhaps make a new one! Merry Christmas! xoxoxo rachael

Thursday, December 16, 2010

Marguarite's 17th c Corset / Bodies Complete

I couldn't be more please with how these came out! As soon as I am finished with Marguarite's Smock, I will post a picture of her wearing them. Until then, I think you will enjoy these. Finished, her bodies measure 6.5" across the shoulder, and 12" at center front from bust to busk point
I used the last of my matching hand dyed silk ribbon for the points, and since I don't have miniature metal aglets, I made my own

Each ribbon point is wrapped in copper wire, and then dipped several times in beeswax....and yes... bees wax from our own bees :)


I used a precious scrap of handspun tow to tie the shoulder straps together in a permanent knot


The tabbed skirts flare out quite gracefully


back view


Back is laced with a single ribbon in the proper 17th c fashion. All in all, I had an absolutely fun and wonderful time stitching these, and of coarse, I kept track of every minute, writing down the time I started stitching in my journal, and again when I finished to get up for anything.... for a total stitching time of 64 hours, 1 minute.

Monday, December 13, 2010

Binding the Bottom of Marguarite's 17th Century Corset


Here you can see that I have finished back stitching the silk binding, right sides together, to the bottom of Marguarite's pair of bodies. This was extremely slow to stitch, about 6 hours for this one step if I remember right. You can see the 'skirts', or tabs, pointing up and away there. I actually used a double thickness of silk on my binding here, as I didnt want the ends of the bamboo working their way thru it, and its so thin, I just felt the bottom needed more. After the binding was on, I again trimmed the linings. NOTE: The center busk pocket. I wanted to leave an open pocket so it could be removed, so the binding only goes thru the upper layer of lining, not thru all layers here.

After the linings are trimmed, I brought the silk to the back and whipped it down, just like on the top edge. It looks right spiffy now!

Here is my busk pocket opening....cause, well, one never knows when they will fall in love, and need to give their busk to their departing beau to carve while he is out Whaling...... If you want to have a pocket like this so your busk is removable, here is a tip~ make sure to cut all your pieces so this opening is the salvage edge! There is no bulk, and its nice and tidy.


Nearly done now. This is the front view after binding. I still need to press the tabbed skirts down.....


And finish the last of the brass grommets~ there are two at the bottom back opening, and then four more each side for the ribbon points (ties used for attaching a farthingale).


Saturday, December 11, 2010

Binding a 17th Century Pair of Dollye Bodies

Here are some progress pictures of Marguarite's pair of bodies. I used 1" hand dyed bias cut silk ribbon for the binding, doubled over as shown both for strength and a more opaque coverage, since its such a light color, and such a thin tissue silk ribbon.
I waited until I was at the strap to trim it to shape (really cuts down on the edges raveling cause the straps are always flopping around while I'm sewing). In the picture above, I have the binding on, and you can see the edges of the linen lining sticking out around it....the next step is to trim all this off~ very important for a nice uniform and equal binding!

After the excess lining is cut away, the ribbon is brought around to the back with my thumb there, stretched as far as it will go and whipped down. To answer your question why am I wearing gloves.....for two , well three reasons actually. The first, the linen I used for the lining is antique and really thick and densely woven, really hard to get the needle thru~ the gloves are excellent at helping me grip the needle and pull it thru nearly effortlessly...2, on my left hand, the rubber helped to grip the slippery silk and pull it taught, and 3, they also keep any oils I have on my hands and fingers off my work. I love sewing in rubber gloves..........


Here is the binding as seen on the front, and the whipped edge to the inside. I really love these two colors together, and in the 17th century...everything was colorful!


Next step was to finish the brass eyelet holes that were up next to the binding at the back opening, and on the front and straps. Top is finished!!! And, I must admit, it looks awesome :)


Starting on the bottom edge now, saved the hardest for last I guess. First, I pin'd the 3 tabs to the bottom edge in their rightful places~ largest next to the back opening, inbetween in the middle, and smallest to the front most area next to the center boning.


I then carefully stitch the binding silk over all the layers. This is very slow going on the bottom edge, as the bodies are extremely stiff, and I cant bend them to make my normal running back stitch, so I am left to stab each stitch one at a time, straight up and down thru all layers, including thru the bamboo, which I am using my pliers to help with. If anyone ever x-rays this in the future, they will find the tip end of my last needle buried in the bamboo 7th from the left...too many broken needles today, and I cant get this one out, so in it will stay!

Friday, December 10, 2010

Good Grief!

Where the heck has the time gone? I think my life remote is stuck on fast fwd.... I have been working on Marguarite's bodies...and good grief. These things are a pain....well...theyre definitely giving me a pain...in my hands, my fingers...my back....my eyes even hurt. blaaaaahhhhhh......... All the while I am sitting with my wonderful wondrous Heavenly Ott light directly in front of me....I try and imagine my ancestors working in mainly sunlight....and wonder, what the heck did they do in the winter??? I mean, a candle can only put out so much light, even with a magnifying water globe in front of it......its pitch black dark here by 4.30 pm...... what did they do all winter long... Sitting in the dark...in front of the fire....trying to keep warm? As much as I would really love to go back in time and just see what all was going on, and what they were EATING....and what they were wearing.......and what the stores looked like inside....I am so very thankful for living in today! But I'm getting off my point for today~ which is binding these bodies. Y*U*K*. As you can see above, I snapped a pic after I bound the first tab in silk....isn't it a pretty contrasting color? I am very happy with this blue.....but actually binding the bodies is a pain in the tuccas. I have bound and picked out twice already today before finally getting the top edge halfway done. These are so stiff, it is really hard to hold them right, cause the fabric doesn't bend so its hard to make a good back stitch...they are small too so also hard to hold. So far, this binding is my least favorite part. I really wanted to use kid, but couldn't find any of the right color, so chose a hand dyed silk. Ill snap a pic tomorrow when the light is good~ until then...... sore fingers going to bed!

Sunday, November 28, 2010

CYBER MONDAY MAKE ME AN OFFER SALE!!!!


Spent the day today watching over the children making their little gingerbread houses...didn't they come out cute? I tried my best not to interfere....just a little help to stick the houses together, and they did the rest. All this Holiday cheer, I'm in a Great Festive Mood.....so! I have decided to make Cyber Monday, TOMORROW , a SPECIAL MAKE ME AN OFFER SALE!! No kidding, I'm serious! Feel free to make me an offer on ANYTHING in my ETSY store, or TDIPT Page, and Ill get right back to you~ while I feel the effort and love that I put into each one of my dollys is well worth their listed prices, I also love to share them, and really want anyone who wants one, to be able to give one a home~
If any of you will be in or near the Trinidad area next weekend, I will be selling with my eldest daughter Tressa on Saturday and Sunday December 4 & 5th at the Holy Trinity Academy Craft Faire~ this year it will be at the HTA Soup Kitchen~ if you need directions, just email me~ would love to see you there :)

Wednesday, November 24, 2010

My "Thanks Be~ To Thee" Thanksgiving Weekend Sale


I cannot express in words everything that I am Thankful for on this Earth. The thought brings me to tears, to which no words can possibly follow. I love my life, I love my Family, and love the path that God has chosen for me. I want to do my best, to add to the Good in the world, and never detract from it. I hope all my readers, friends and customers have a most Blessed Thanksgiving Day tomorrow~ and as a little Thank you, I am offering FREE SHIPPING ON ANY ORDER PLACED FROM 25 NOVEMBER~ 1 DECEMBER 2010. This is good on my TDIPT Page, and in my ETSY store. IF you pay automatically, I will refund the shipping cost to you. Thankyou so much for sharing this year with me, and may next year be even better!

xoxoxoxo Rachael


Sunday, November 21, 2010

Back Home & Resting....


I am back home from surgery now and resting. WHAT a year/summer this has been. I don't like to talk about me or my body (BLEK) BUT..... I have entirely too many emails to answer, and not near enough energy, and hopefully, my little 'experience' will inspire one of you, to seek answers elsewhere, if your not getting them.....I'm probably not making a lick of sense...so here goes, my condensed version~ In the spring of 2009, I went for my wonderfully fun annual medical exam....and told my dr( female, who has been a dr for eons and eons) that I was having pain in the nether~regions....and some other things, to which she replied, its the FUN of getting OLD. She sent me for an ultrasound, and when the results came back, she sent me a photocopy, with " Don't think anything to worry about" written on the bottom. That was it. done. finito. except I was still having pain....I tried to call her several times, and could never get her on the tele, left messages with her nurse, that were never returned. I felt like poo, but in the means now we have gotten a huge bill for the ultrasound, and so I figured whatever must be in my head, and it will go away. Except, it didn't. This spring came around, time for my annual again, except I was still paying on the ultrasound from last year, so I put off going to see the dr until I had paid off that bill~ which was this past Aug. Went to see her again, told her the pain and other things were getting worse, to which she kindly replied how tired she was of 'everything' and she COULDN'T WAIT to retire this Nov. she sent me for another ultrasound. This is where I want to slap myself..... went to the ultrasound, the results came back, worse than before, but this time, the radiologist recommended that I GET ANOTHER ULTRASOUND IN 6 MONTHS...my dr called and READ verbatim the results, to which I said, HEY~ I have NO IDEA WHAT YOU ARE SAYING?!!! And she said, it recommends I get another in 6 months~ to which I replied, well the cysts are still there from last year, didn't they compare the two???? So my Dr says, that's what they recommend, don't worry about it. And phone call was done. I sat there feeling like an absolute IDIOT. I was feeling worse and worse, and starting to loose weight now, so I went to see my husbands Dr. It was not easy. I really HATE talking about myself to a Dr....to anyone....and I didn't even know him. But I gathered my test results, and went to see him, and he was very concerned and got me answers IMMEDIATELY. When my problems were no longer within his area of expertise, he sent me to my surgical Dr and well, here I am now, all fixed and ready for another year...I think :) My test for ovarian cancer came back good, and Dr didnt call me on Friday with pathology on the bits they took out, so that means all is well. I had 2 cysts on an ovary that had attached and were obstructing my bowel, so Dr fixed that too. Geee, go figure, someone going out of their way to fix something that wasn't stated in writing before hand......I guess what I mean to say is, that if you feel in ANY way that you don't like the answer your Dr is trying to give you, or not, GO TO A DIFFERENT ONE.

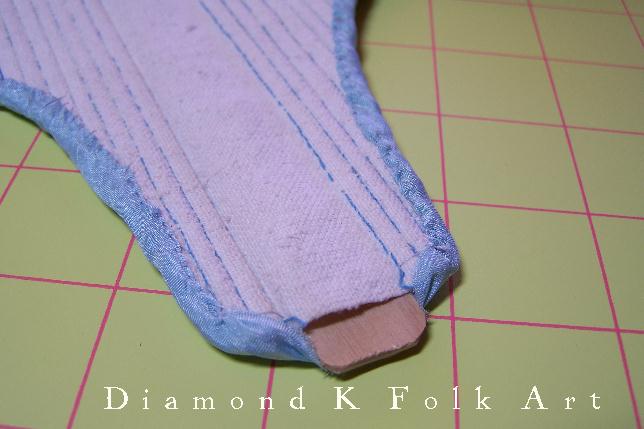
Do you like the pic? Its a little sneek peek of the real solid silver spangles I have started making for the lace on Marguarite's jacket. The squares on the mat are 1", to give you a size reference...I have about 200 finished, ohhh...800 or so more and Ill be done :) It's good to be home


Sunday, November 14, 2010

TDIPT Update this evening and other news...........

I love this picture :) Earlier this fall on my birthday, I received a little pair of doll shoes and the wrapping paper had little paper dolly clothes printed on it. Pippy asked if she could have the paper, it was just a smidgey, maybe 9x11 piece of paper....so I said she could have it, and off she zoomed down to her little 'work table', which she has beside mine. She wouldnt let me see what she was up to, but in about an hour, she showed me her paper dollies she made, and I was SO proud of her, I think I even shed a tear! She cut out the clothes, and made the girls new heads and legs~ I didnt help her at all~ not one teensie weensie bit!
I didnt even get upset that she used nearly an entire roll of clear tape...I just love them. She certainly does have an active imagination, and since our birthdays are just 5 days apart, perhaps she is my little mini me. See how she used dollys bonnet on the left there, for an apron instead? I just had to share!
I will have a little update on the TDIPT Mercantile this evening at 7 pm. Havent been feeling myself for some time, and am leaving tomorrow to have surgery to get my offending parts removed~ so if you would like something off the update, it will probably be wednesday at least before I check my email again. I have never ever not posted an update in all my years on the internet, and am not planing on missing one now~ I have some wee little pretties for your parusal....little 18th c swaddeled baby Christmas ornaments, and a few very special Christmas pins. Hope youll stop by and take a peek, cause its beginning to look alot like Christmas on the Mercantile
xoxoxoxo rachael

Thursday, November 11, 2010

A New Winter Project.....


I have always had my eye on this early 1900 display case since we have been here in Colorado~ so when the Mercantile in town called me to say they were sadly going out of business, I jumped at the opportunity to get it. Its HUGE, a bit over 8' wide! And so heavy.....I don't exactly have the perfect place for it anymore, as I am kind of a furniture hoard....but I managed to squeeze it into the gallery, and have all sorts of great things planned for it.....first thing being, a nice stripping of the horrid paint!

It is solid oak, and under the hastily applied black paint, is a layer of tan, under that, a layer of white, and under that, a hideous school bus yellow! YUK! I wonder what store could have possibly painted over the beautiful oak, in favor of that color????? In any case, this will certainly be an all winter project, as I am using a non toxic stripper, and lots of elbow grease. :)
My mind is racing with all sorts of pretties that I can fill it with~and when I look at it, I find myself dreaming of all the things it has held over the years....... I wonder how many children stood wishing for something that was inside?

Wednesday, November 10, 2010

International Quilt Festival, Houston 2010

Got home yesterday from the festival, it was entirely too much for my mind to comprehend. My Mother flew down from Wa state to go with me, and from my house we drove drown. Spent Sat and Sunday at the show
This is a picture of a smidgey of the vendor booths, before they opened on Sat. I took this picture from a little bubble window above the floor~ Saturday there were so many people, I saw all sorts of new things on Sunday, that I didn't see the day before cause if a booth had a hoard of folks in it, I kept going! All day Mom and I felt like a fish swimming upstream, always seemed like we were going against the flow of people. It was definitely an experience I will always remember. Sunday was perfect~ Id say a quarter of the amount of people than Sat. The isles were numbered up to 1600 I think....with everything under the sun available. I was disappointed a little, for me... as I am a traditionalist, and was looking for 100% natural silk and linen threads and fabrics, and there just weren't too many, matter of fact, of all the vendors there, I could count on my ONE hand, ones that had yardage, never did find anyone with linen thread. If I had to sum of the show in one word, it would be "Technology" ... ok, maybe two words, the other being. ..." bling" I have never seen so many rhinestones and sparklies on a quilt before in my life! I had no idea that was the 'in' thing now a days....and I saw only one booth with hand quilting frames....everything I saw was computer aided quilting and sewing....technology technology!

I have also never seen such tall buildings this close ever in my life! I am behind the times, I know, and it doesn't bother me a bit :)


It was a pleasure viewing the quilts, so many wonderful ones, and getting to meet friends and fellow quilt makers. I bought a wonderful early block print fabric as a souvenir, and brought home my quilt, now hanging once again up on the wall behind me. I have missed it.


Thursday, November 04, 2010

Off to Houston....

I am off to Houston early tomorrow morning to pick up my Baltimore Album quilt, 'History's Humble Servant' from the International Quilt Festival show. It was a finalist, but didn't win anything~ that's OK with me, I am happy with it, and I have been missing it these months it has been gone and my wall has been standing empty. Am looking foreword to seeing the Baltimore exhibit too, but wont be able to take any pics of it for you, as it is one of the listed exhibits not allowing pictures to be taken. Mom is here from Washington and going down with me, just the two of us...so we can wander and wander till our legs give out, without anyone saying....'can we go yet, can we go yet???'

Tuesday, November 02, 2010

If U want somthin' done, do it yourself.......

That's what my parents always told me growing up, and what I tell my own children still. I guess if I had a saying I live by, it would be that. I find it much easier to do or make for myself, instead of trying to find from others, or depend on others for~ and especially so when it comes to dolly things! When I started making reproduction doll size corsets and stays, I grew so tired of trying to find supplies at the right scale, that I just eventually gave in and made my own. Little brass rings are very hard to find in the right scale for stitching over to make lacing eyelets up the back of a set of stays....who on earth would use hunky klunky metal grommets....iiiiiick! Above the the back closing of Marguarite's bodies, boning channels are stitched, and I have lightly marked with a pen where I want the eyelets to go~ just one side tho. After I get the first side done, I use it as a guide for the other side, so no need for marking.


Making the metal rings are very simple~ all you need is a pair of flush cut wire cutters and flat pliers (can find in jewelry supply), a mandrel to wrap your wire around (size of the mandrel or rod, will be the finished size of your eyelet holes), and wire. I used brass wire, cause it doesn't rust, and is nice and stiff. Use a heavier gauge for larger rings~ Marguarite's are small size, so I am using 24g.

Just take a length of wire, and wrap it around your mandrel~ you can use a pencil, wooden dowel, knitting needles...those are great cause they come in a variety of sizes....
Keep the wire as tight to the rod as possible, and try not to twist it.

When you get a length of wire wrapped around the rod, slip it off, and then take your flush cutters and just snip a line up from one end to the other, and the rings will fall off as you continue on to the next. You'll end up with a pile of open ended rings like this


The next step is to 'finish' the rings off with your flat pliers. Mine also have round tips, as you can see above. If you look closely at the picture, the two rings on the left are the before ones, the two on the right are finished. I take and pinch them the rest of the way closed and then take and lay them on the flat surface of the pliers, and give them a good squish so they lay nice and flat and are not twisted at all. Once you have your rings, just lay them on the surface where you want them, and stitch over them all the way around to cover the brass, and they make a very nice reinforced and even eyelet hole.


After I got the eyelet holes done, I filled the boning channels on each side of the back opening, and am now ready for binding. I will stitch the final lacing eyelets after the binding is on, as they are just directly above it.

Saturday, October 30, 2010

Wishing you all a Happy & Safe Hallowe'en~ May you be visited by many an enchanted spirit & take joy in each and every one!

Tuesday, October 26, 2010

17th c Pair of Bodies Progress!!


I have been progressing nicely on this pair of bodies. I am making every effort to be as period correct as possible, and in nearly every minute of stitching, I keep thinking to myself, its really no wonder why men were the staymakers! One really does need a lot of strength in their hands~ I have overly strong hands, and mine are really feeling this every step of the way. Got the back boning channels stitched, and decided to only make 3 on each side of the back opening~ Dorthea's had 4, but this is a scaled down version, and I just didn't like the bulky look of 4 channels. The wide one next to the opening is for the lacing holes.

So next step, once all the channels are stitched, is to fill with your boning material. Whalebone, splints and bents(type of stiff grass) were all used in the 17th c as boning/ stiffening materials. I have plenty of whalebone, and I really would have liked to have used it, but its so darn brittle, it just cannot be cut. Perhaps it wasn't like that 200 years ago when it was harvested, but it sure is now, so I will save that for something with 1/4" channels, something I wont have to cut it down for. A person could also use hemp or jute twine to bone their channels as well, I have used both in later period corsets and it works wonderfully....but I wanted a really rigid, period correct look, so I am using bamboo for Marguarite's bodies. Above I have already cut a hardwood center busk, and bones the 3 channels each side of it. I used the pliers to nip the ends off right at the edge of the material. I was going to work from the center out, like I normally do, but since I had to still stitch the lower edges of the boning channels going up the side of the front panel, and I needed to actually be able to get my hand around the material to stitch it, I switched and did the side sections next.

This really worked out well, and I stitched the channels as I filled them, so the little pieces wouldn't slip out. I used bamboo BBQ skewers, and split them with my x~acto knife to the right thickness, then whittled the edges until they were the perfect fit for the channels. On the side pieces, I cut them to the exact angles top and bottom, then slipped them in, and stitched the baseline below them. Here is a hint when using any type wood material for your boning. Trust me, this will save you much time and effort! Before you fill the channel, first pre-fit or stretch it with something smooth~ I used a metal rod that was the exact size of my channels. Insert the metal rod all the way up to the tip of the channel...and it wont be easy! You will have to wiggle and jiggle it to separate the 2 layers of lining from each other....twisting is actually best, I found. This acts like a glove stretcher, and once you pull it out and insert your boning material, it will slip right in like butter.


This is the main reason why, if you are using a fragile fabric like silk or velvet for the outer layer, you want to have a backing fabric for it, so your boning doesn't pierce it, or grab a thread and make a run or hole. The boning is placed between the 2 linings, not up against the outer fabric. See my rubber gloves~ I am forever changed and love sewing with them on~ they help my sewing hand grasp the needle easily, and I wore one on my other hand while doing the boning, to help grab the bodies better, and they also kept any dirt and oil on my hand from getting ground into the fabric. One really has to get physical when boning a corset like this. I wont lie, there was some swearing involved......

Here is the above bamboo stitched into its channel. If you have angled channels, it really does make a huge difference to take the time and cut the angles in the boning material as well, so the entire channel is filled. If you leave the top and bottom of the boning straight across, it will look "hokey"....this is why I don't like to use steel boning, because it is so hard to cut.


Front panel fully boned~ woo hoo!


Trim the boning right to the edge, the binding will cover this, and keep them from popping out.


Inside. Next step is to stitch the lacing holes at the back opening~ don't fill the back boning channels yet~ it is easier to needle the eyelet holes first, then add the stiffness last.

Sunday, October 24, 2010

A MUST see!!!!

If you are anywhere in the vicinity of Oxfordshire, UK...you simply must make the trek to Witney Antiques to see their current exhibit, "Wrought with the Needle" ~ an exhibit of outstanding English embroideries from 1590~1750 (and get this, many are for sale if you have a few hundred grand in the bottom of your purse) You can see and read more about it here on their website~ www.witneyantiques.com . I ordered a catalogue thru the mail and it got across the pond to me here in the US in a woppin 3 days! Ohhhhh my goodness, it is an absolute treat for the eyes to behold, with wonderful closeup views of embroidered jackets and coifs, mirror surrounds, bead work....if you have at all the slightest interest in early Jacobean, Elizabethan, or Stuart embroidery, you simply must must must have this book